
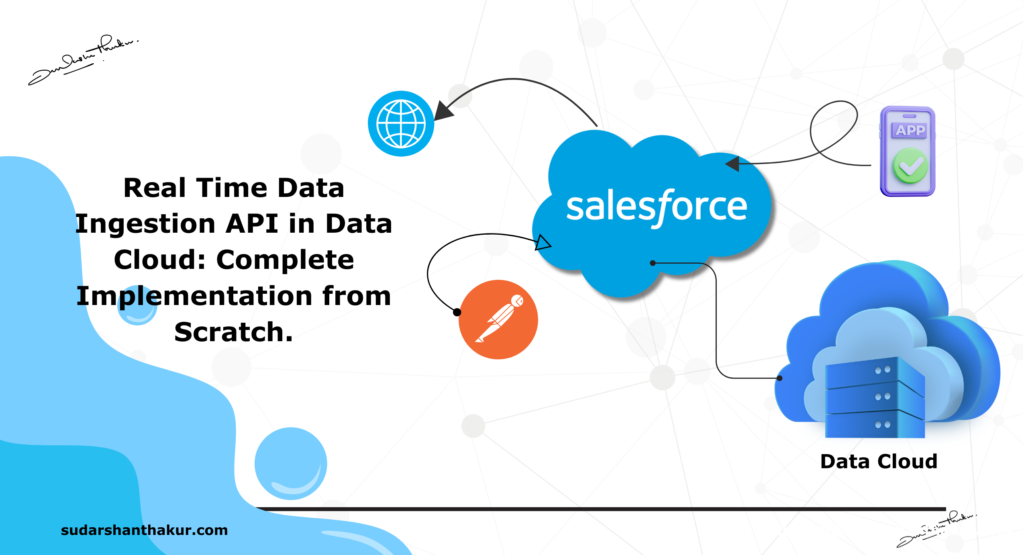
Real Time Data Ingestion API in Data Cloud: Complete Implementation from Scratch.
Step 1: Generate Public and Private Key
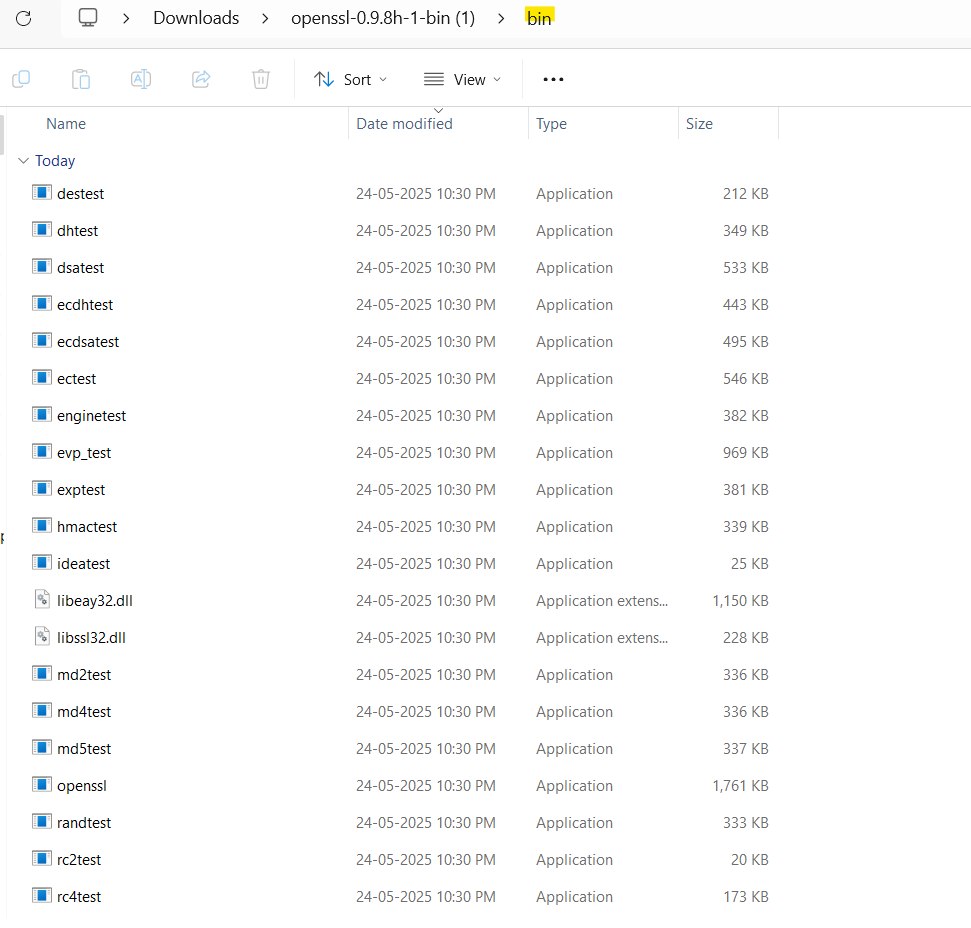
Step 1: Download openssl or download Binary Library from the link here .
Extract the folder and goto Bin folder. In address bar highlighter in yellow type “cmd”. This open command prompt.
Step 2: Type “openssl” and hit enter to see if openssl is working.

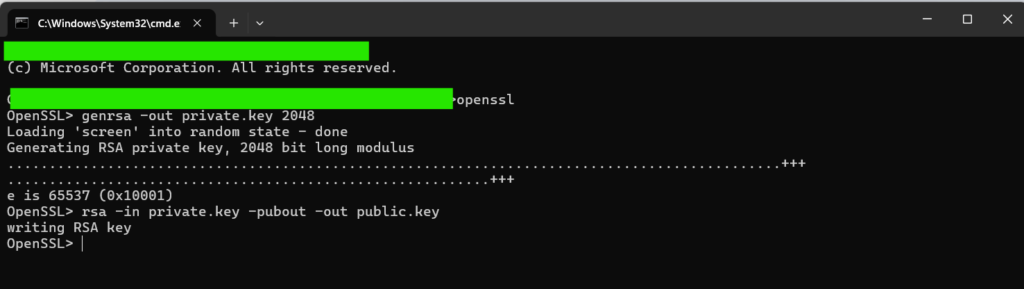
Step 3: To generate Private key type:
OpenSSL>genrsa -out private.key 2048
This creates a 2048-bit private key named private.key.
The format is .pem

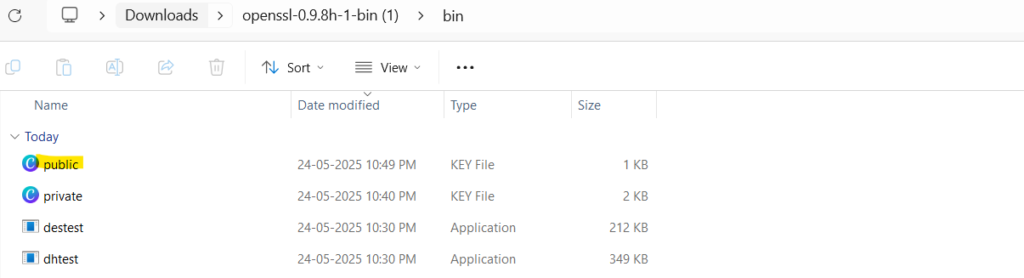
This generates a private key and named private key in the bin folder. If You open it You can see the key with format as .pem .
Step 4: To generate Public Key type:
OpenSSL> rsa -in private.key -pubout -out public.key
The Public Key also appears in Your same folder.
Step 5: To generate a Certificate Signing Request (CSR) Type:
OpensSSL>req -new -key private.key -out request.csr -config openssl.cnf
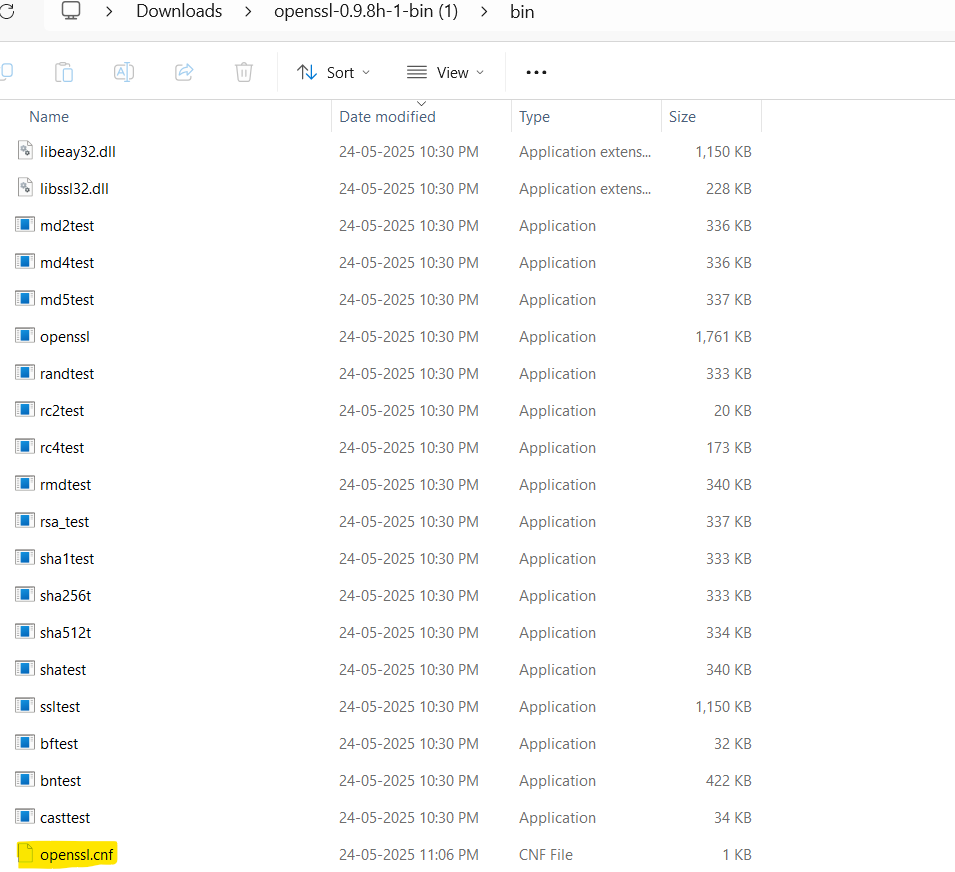
If You get error: Then open notepad, save it with the name openssl.cnf with the code as given below. You can change the values as well and save it in the same Bin folder where Public and Privae key is present and re run the command.
[ req ]
default_bits = 2048
prompt = no
default_md = sha256
distinguished_name = req_distinguished_name
x509_extensions = v3_req
[ req_distinguished_name ]
C = IN
ST = West Bengal
L = Kolkata
O = EB
OU = Automation
CN = sudarshanthakur.com
[ v3_req ]
subjectAltName = @alt_names
[ alt_names ]
DNS.1 = sudarshanthakur.com
DNS.2 = www.sudarshanthakur.com
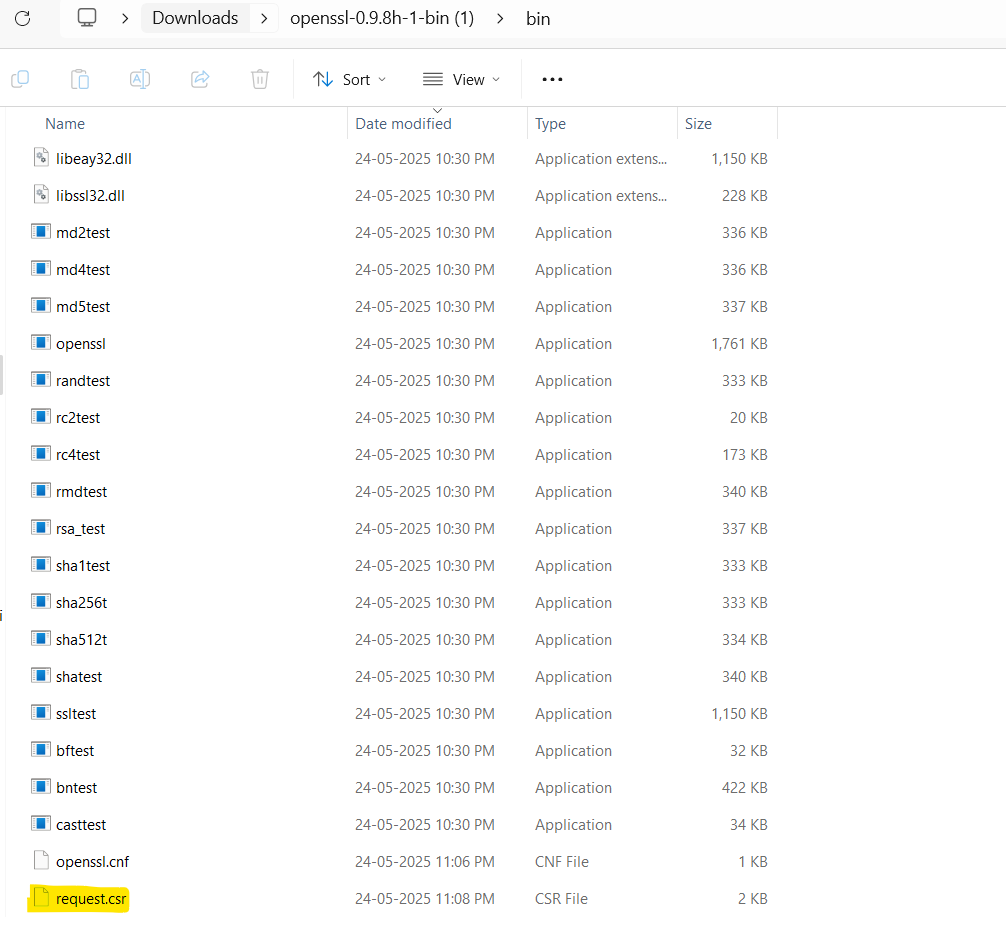
Rerun the command and Your csr file is made.
Step 6: To generate a Self-Signed Certificate (.crt) Valid for 365 days, Type:
OpenSSL> x509 -req -days 365 -in request.csr -signkey private.key -out certificate.crt


Note: For production environments, it’s recommended to use a certificate issued by a trusted Certificate Authority.
Step 2: Create a Connected App in Salesforce
Step 1: Log in to Salesforce and navigate to Setup.
Step 2: In the Quick Find box, search for App Manager and click on it.
Step 3: Click New Connected App.
Step 4: Fill in the required fields:
Contact Email: your email
API Name: auto-filled
Connected App Name: e.g., DataCloudJWTApp
API Name: auto-filled
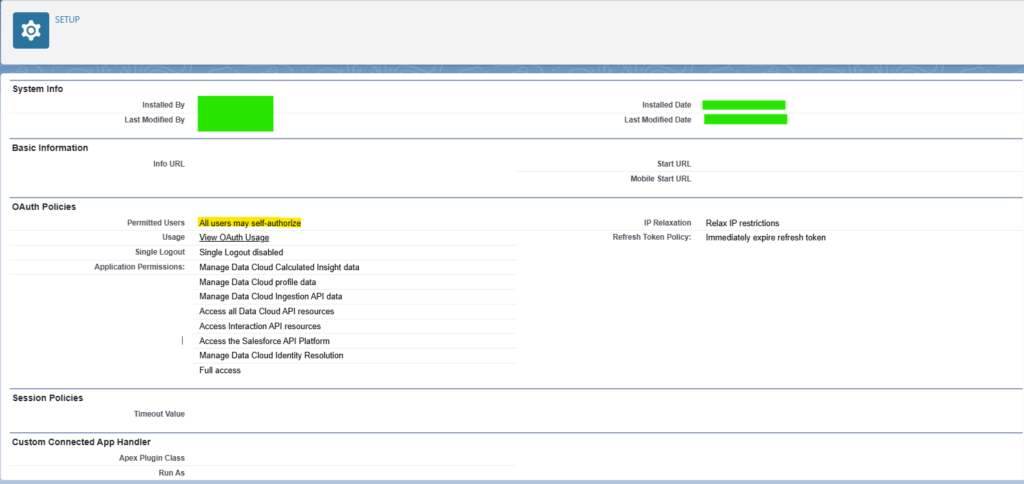
Step 5: Under API (Enable OAuth Settings):
Check Enable OAuth Settings.
Callback URL: https://login.salesforce.com/services/oauth2/success
Selected OAuth Scopes: As Shown (can add more)
Step 6: Check “Use Digital Signatures” and upload the “certificate.crt” file you generated earlier.
Step 7: Click Save.

Step 8: After saving, click on Manage Consumer Details to retrieve the Consumer Key (Client ID).
Note: This might send a OTP to the email address entered during the configuration of Connected App.
Step 9: Set App Policies.
App Manager>Connected Apps> Manage>Click on Your connected App> Edit Policies
OAuth Policies> Permitted Users> Admin approved users are pre-authorized. or Select All users may self-authorize(for testing users)
Save
Step 10: To Assign Profiles:
Connected App detail page, click Manage Profiles>Select the profiles that should have access to this app.
Step 3: Create a Data Model Object (DMO) in Data Cloud
Step 1: Navigate to Data Cloud in Salesforce.
Step 2: Go to Data Model
Step 3: Click New to create a new DMO.
Step 4: Fill in the details:
Object Label:
Object Category:
Step 5: Click on Add Fields
Give Field Name, DataType and Is Primary Key
Click Save
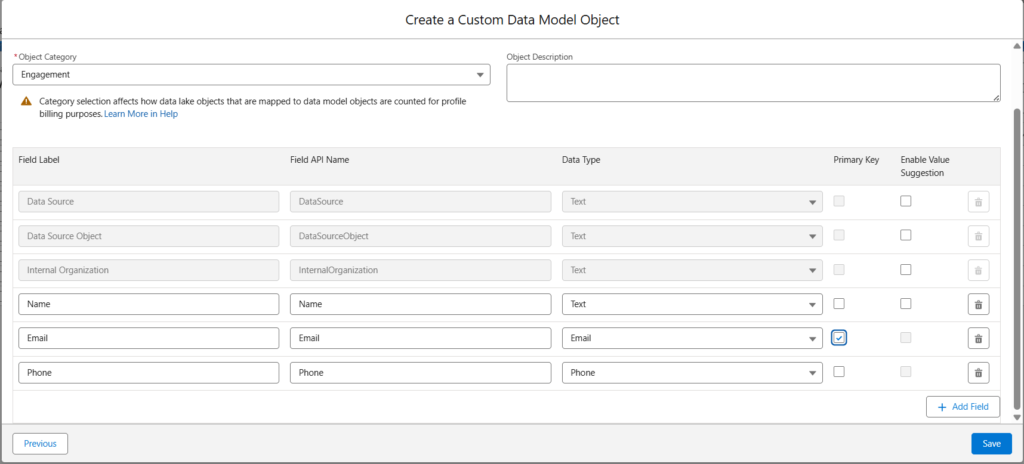
Step 6: Click on Add Fields
Give Field Name, DataType and Is Primary Key
Click Save
Step 4: Create Schema for Ingestion API
Step 1: Navigate to Data Cloud Setup> Ingestion API> Select the API name which should be same as that of Your DMO created in Previous step.
Note: If It’s not there make an New Ingestion API and Upload Schema and then check for DMO in step 3.
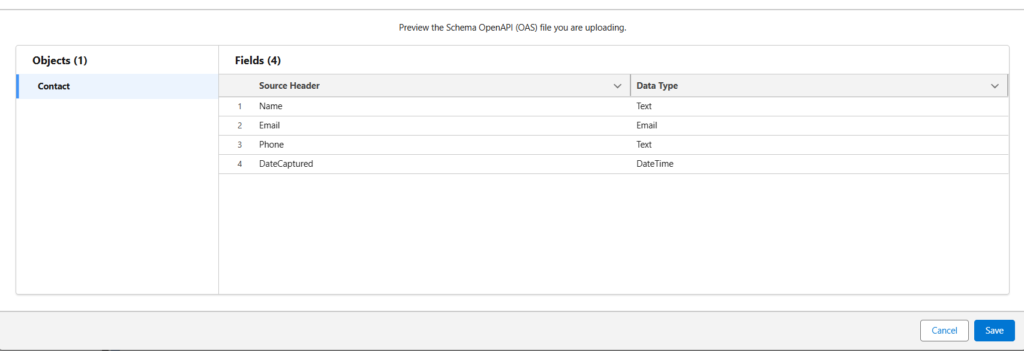
Step 2: Upload Schema as a .yaml file.
To Build .yaml file: Notepad> copy the code as below
openapi: 3.0.3
components:
schemas:
WebEngagementEvent: //ObjectName
type: object
properties:
Name:
type: string
Email:
type: string
format: date-time
Phone:
type: number
Save as .yaml file.
Upload the file and click “Save”
Note: I have used Contact as object in place of WebEngagementEvent as in above .yaml schema file. This is the object which will appear while making Data Stream.
Step 5: Create an Ingestion API Data Stream
Step 1: In Data Cloud, navigate to Data Streams.
Step 2: Click New Data Stream and select Ingestion API as the source.
Step 3: Click New Data Stream and select Ingestion API as the source.
Step 4: Choose the DMO we created in previous step.
Step 5: Select the Object available. (“WebEngagementEvent” instead of “Contact” as per above schema.)
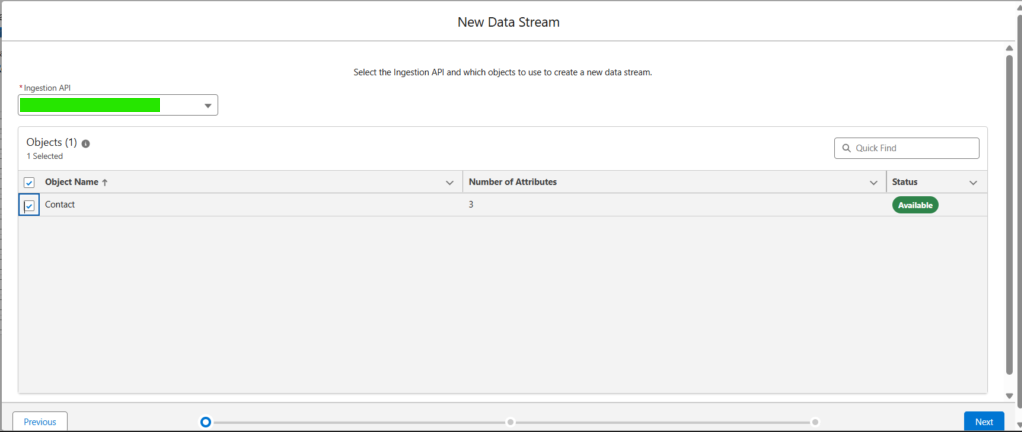
Step 6: Click Next
Step 7: Fill in the details
Category: Engagement/Profile/Other (If You choose Engagement then there MUST be a data field in Your schema.)
Primary Key:
Event Time Field(required for engagement catagory) :
Record Modified Field (optional for Profile and others catagory):
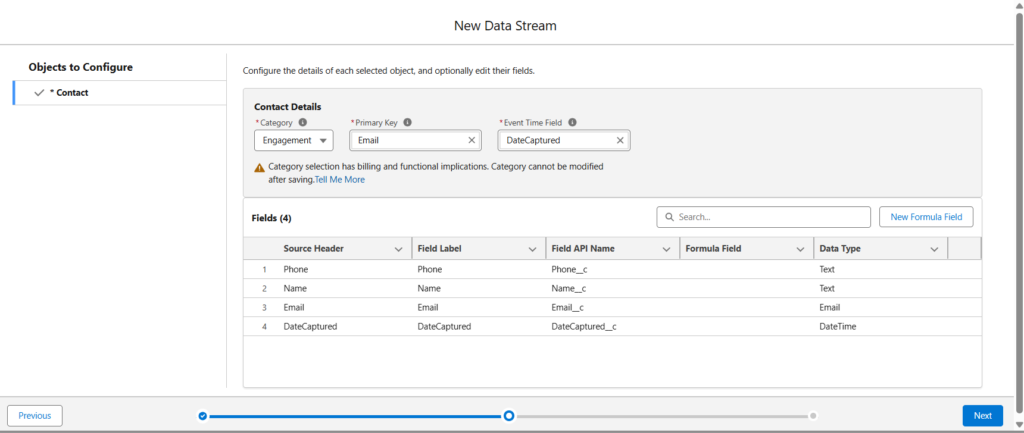
Step 8: Click Next
Step 9: Click Deploy

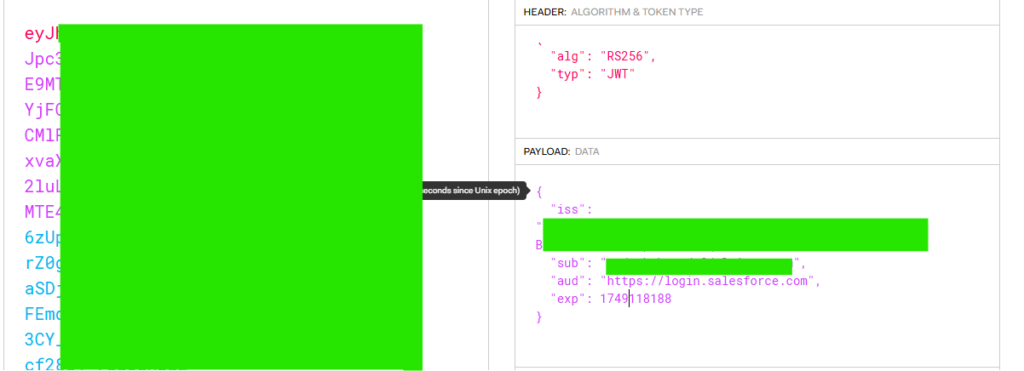
Step 6: Generate a JWT and Obtain an Access Token
Step 1: Open jwt.io
Step 2: Create the JWT Header:
{
“alg”: “RS256”,
“typ”: “JWT”
}
Step 3: Create the JWT Payload:
{
“iss”: “YOUR_CONSUMER_KEY”, //Get this from Manage Consumer Details in Connected App in SF Step2
“sub”: “YOUR_SALESFORCE_USERNAME”, //Your SF username
“aud”: “https://login.salesforce.com”,
“exp”: CURRENT_UNIX_TIMESTAMP + 500 // expiration time of token. Get on epochconverter
}
Token is generated at left side.
Step 7: POST JWT to Salesforce Token Endpoint
Step 1: Open Postman
Step 2: POST Method
Url: https://login.salesforce.com/services/oauth2/token
Header: Content-Type: application/x-www-form-urlencoded
Body (x-www-form-urlencoded):
grant_type=urn:ietf:params:oauth:grant-type:jwt-bearer
assertion= <JWT Token generated in last step>
Click “Send”
Step 3: Output : 200
{ “access_token”: “*******************”,
“scope”: “cdp_ingest_api”, “instance_url”: “http://***************.salesforce.com:6109″, “id”: “http://dcorg-ltm.internal.salesforce.com:6109/id/00Dxx0000006JFrEAM/005xx000001X9hBAAS”, “token_type”: “Bearer” }
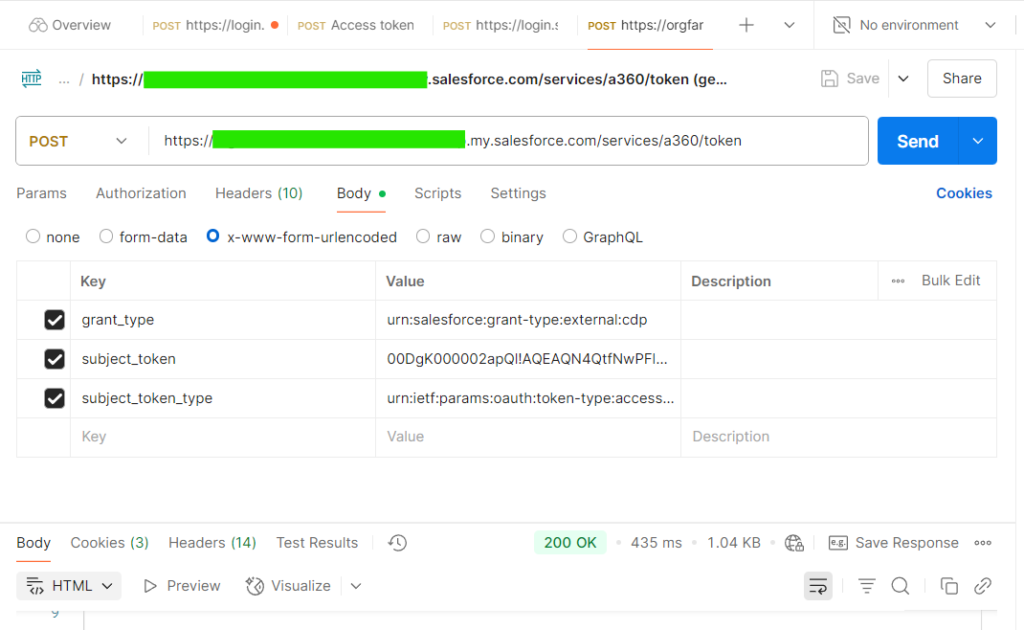
Step 8: Exchanging Salesforce Access Token for Data Cloud Access Token
Make a POST request to exchange the Salesforce access token for a Data Cloud token.
Step 1: POST Request
Url: https://<Your instance url>/services/a360/token
To get Your instance url: Below access token in previous step, bolded in step 3 in above step output. or login to sf and copy the header url.
Step 2: Header:
Content-Type: application/json
Step 3: Body:
grant_type=urn:salesforce:grant-type:external:cdp
subject_token= <Your access token generated in last step.>
subject_token_type= urn:ietf:params:oauth:token-type:access_token
Send
200 OK
Step 4: The response is:
{ “access_token”: “eyJraWQiOiJDT1JFLjAwR**************************************************************************************************************************************IjoiYjk1ODA1ZDUtM2MzYS00MDNkLWJiNjgtNjBkNTJlNmM4OTBjIiwic2ZhcHBpZCI6IjNNVkc5QU9wNGticmlaT0lmaDR5Zk9BWVBSMWljMmpvUkNCSHBkVm1pcFdTTmxtc3BPZWJvVW1xZ0x0ckhwOVFUVFAwalZzeDRIeXNRbjEuTVJrMXIifQ.GAWqiPpVJoDig-adGtD4d5cO7L7JaIn2mOYH9GyDD7oO7Ayrsnv_k05QRPp-B1gSd4U8lqE_cuC0MTE9L6lzJA”, “instance_url”: “https://a360.cdp.cdp001.dev1-uswest2.aws.sfdc.cl”, “token_type”: “Bearer”, “issued_token_type”: “urn:ietf:params:oauth:token-type:jwt”, “expires_in”: 7257 }
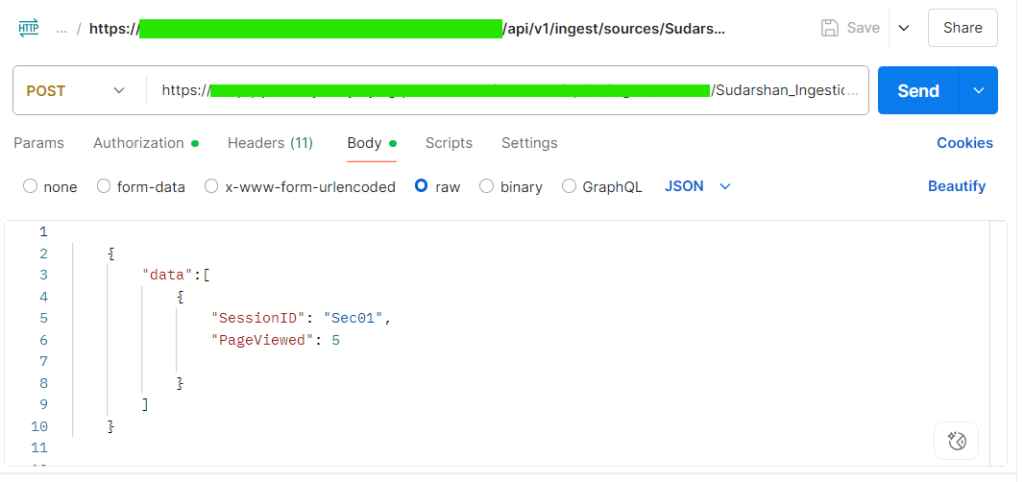
Step 9: Push Data to Data Cloud
Step 1: Navigate to Data Cloud Setup> Ingestion API> click on Name of Your Ingestion API
Step 2: Click on Dropdown and “copy object url” as shown in the image below.
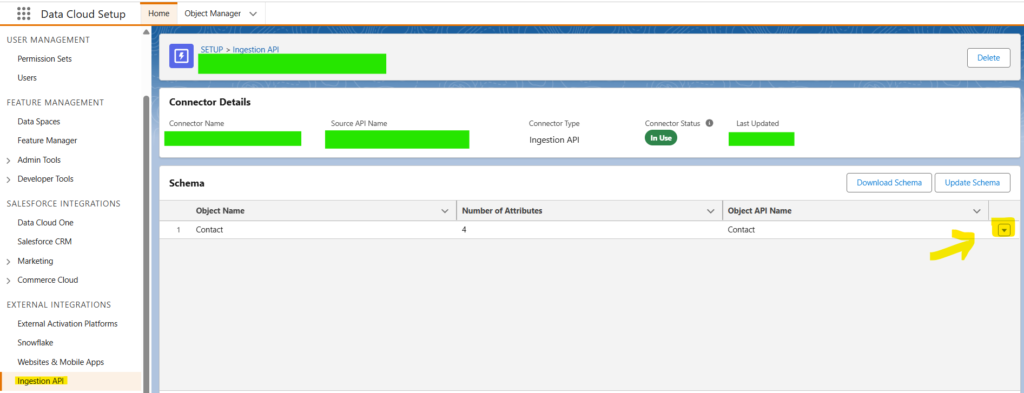
Step 3: Go to Postman
Post Request
Url: The Object url taken from step 2.
Authorization: Bearer Token: Your access token taken from above last step.
Header:
Content-Type: application/json
Body: Click raw>JSON
{
“data”:[
{
“Name”: “ABC”,
“Email”: “abc@domain.com”,
“Phone”: “87067546XX” //Since I have taken it as Text data type. If Number then remove “”
}
]
}
Step 4: Click Send
Output: 200 OK
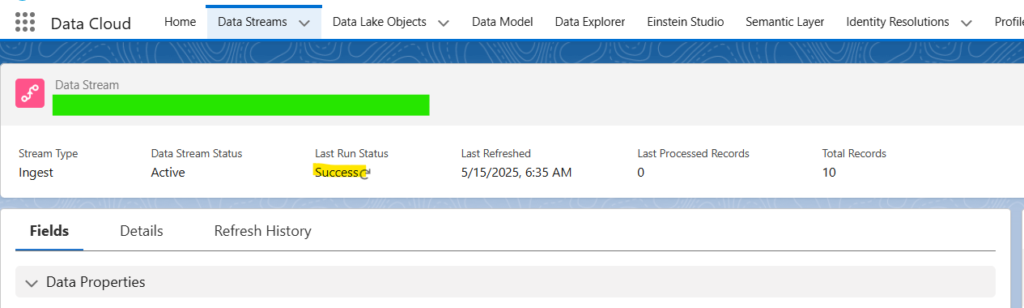
Step 10: Verify Data Ingestion
Step 1: In Data Cloud, navigate to Data Streams.
Step 2: Click on your data stream.
Step 3: Check the Ingestion Status tab to see the success/failure.
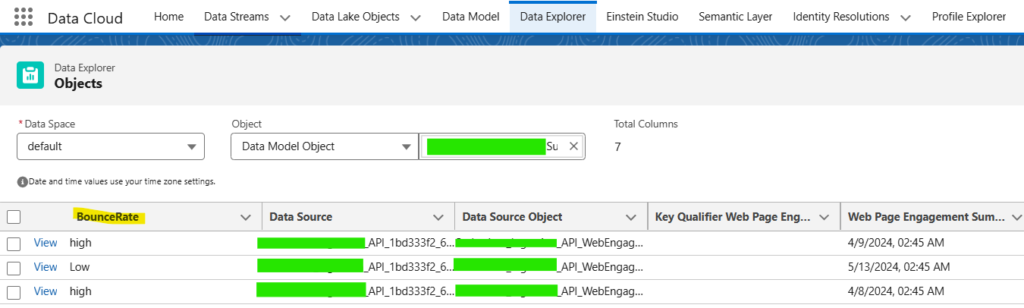
Step 4: Navigate to Data Explorer
Step 5: Select Data Space
Select DMO and Your Object name
Your data appears.
Congrats!!! Your real time API Ingestion is completed !!
Feel free to drop me an email on contact@sudarshanthakur.com / s.sudarshan.thakur@gmail.com if You are stuck in any step or find any error or If You have a easier method to implement this. Happy Learning !!
🔹 Need help optimizing your SFMC campaigns? Contact us today!
Want more insights like this? Subscribe to our newsletter and receive actionable marketing strategies, case studies, and expert tips directly in your inbox. Let’s scale your business together, one strategy at a time!