
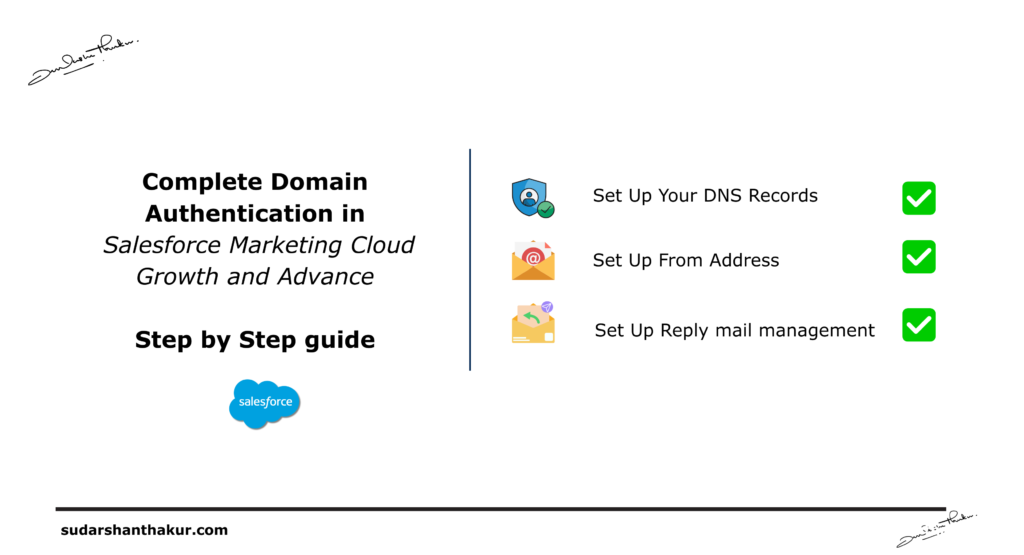
Domain Authentication Made Simple: SFMC Authorized Domain, DNS & RMM Explained
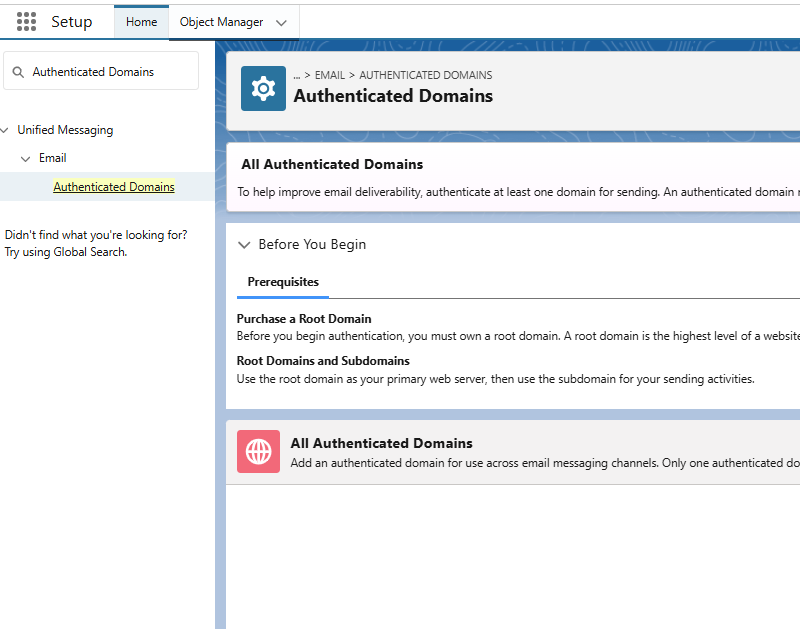
Step 1: From Setup, in the Quick Find box, enter Authenticated Domains, and then select Authenticated Domains.
Step 2: Click Add Domain.
Step 3: Review the prerequisites and click Continue
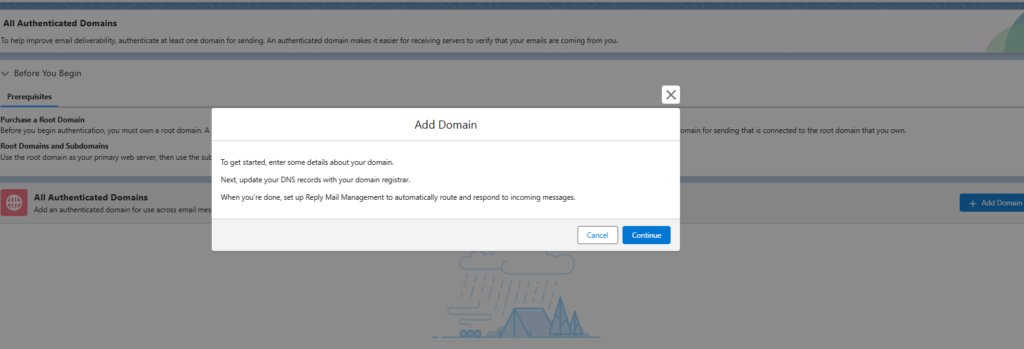
Step 4: Enter the subdomain information that you want to use for sending, and then click Submit.

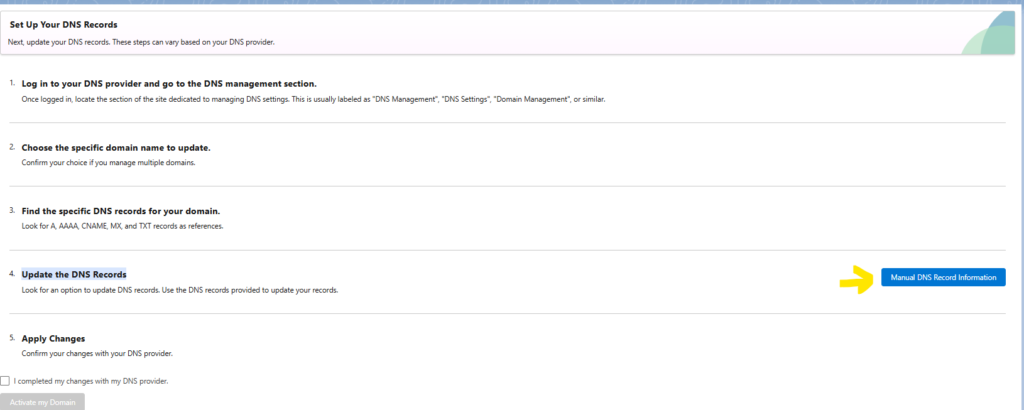
Step 5: Log in to your DNS provider and go to the DNS management section.
Once logged in, locate the section of the site dedicated to managing DNS settings. This is usually labeled as “DNS Management”, “DNS Settings”, “Domain Management”, or similar.
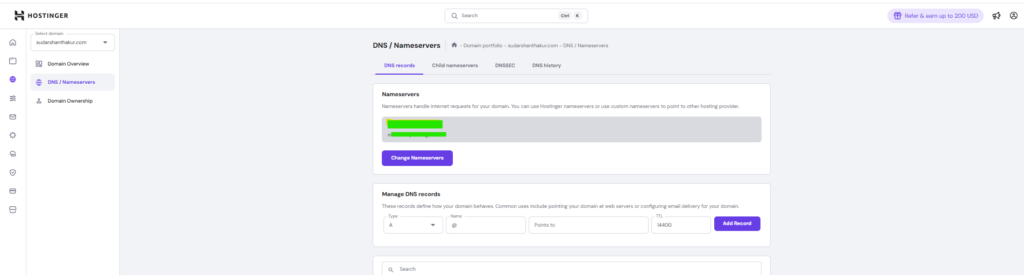
Step 6: Choose the specific domain name to update.
Step 7: Look for A, AAAA, CNAME, MX, and TXT records as references.
Step 8: Update the DNS Records. Get details by clicking as shown in the image below.
Step 9: Get the value and key pair.
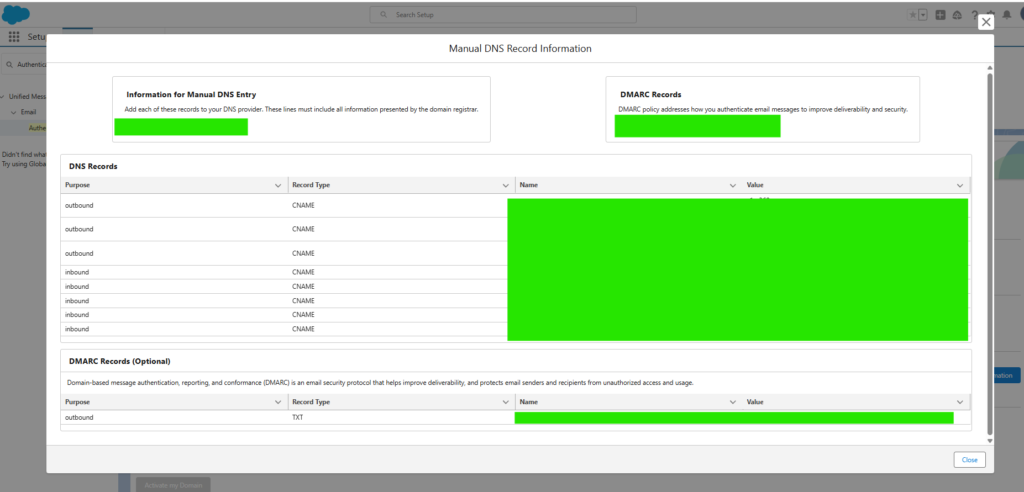
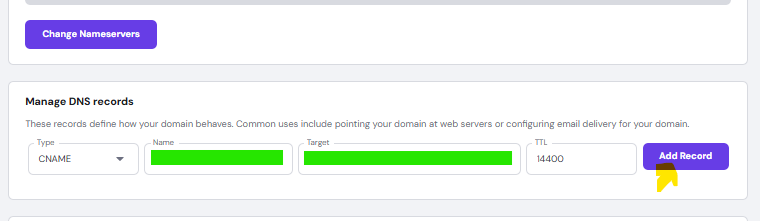
Step 10: Take Key Value pair from Org as shown above and add in the DNS Management. Click Add Record. Do it for all key value pair.
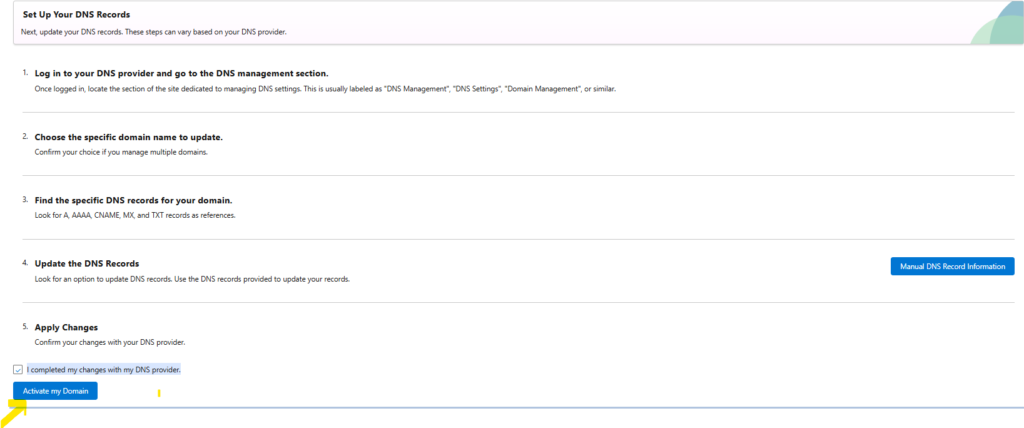
Step 11: Apply Changes
Step 12: Click the check box in Your Setup.“ I completed my changes with my DNS provider.” Click “Activate My Domain”
Step 13: It takes 24 hours to complete refresh. After 24 Hours…

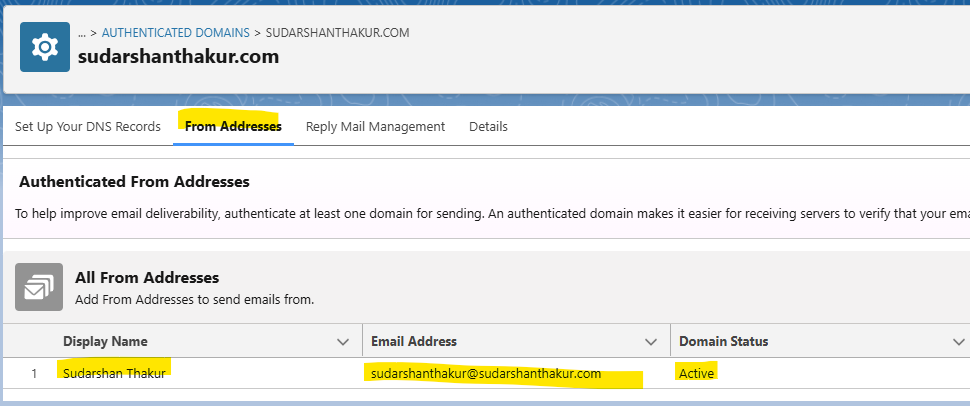
Step 14: Click on from address and verify Your new domain is visible here and the domain status is “Active”.
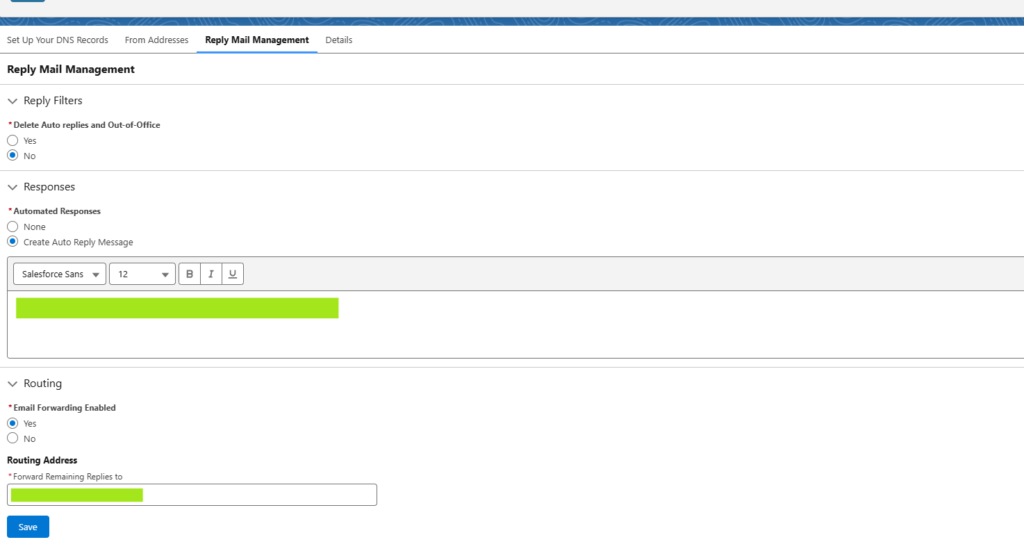
Step 15: Click on Reply Mail Management and fill in the details as shown below.
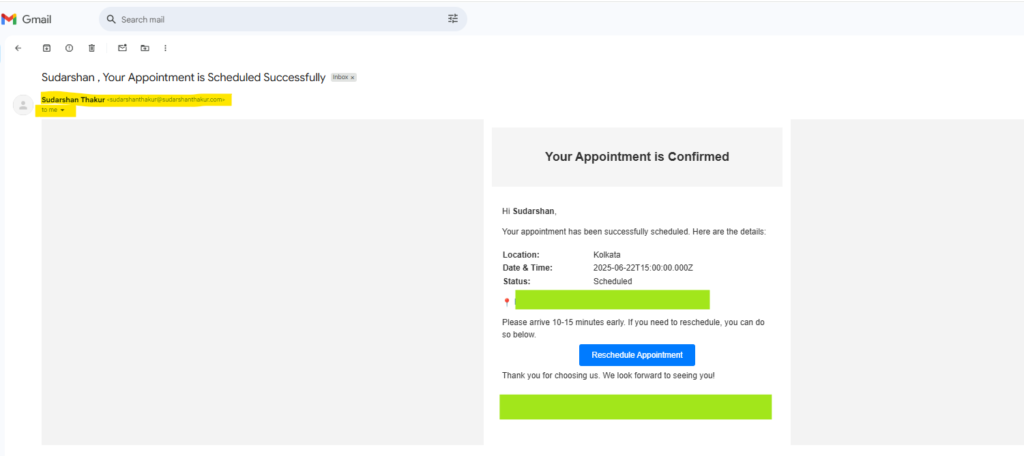
Step 16: You have successfully completed Your Sender Profile ! Trigger a dynamic email from the flow and verify in Your inbox.
Want to learn How I created end to end flow? Stay connected ! Follow me on LinkedIn by clicking here
🔹 Need help optimizing your SFMC campaigns, Marketing Growth and Advance or Data Cloud? Contact us today!
Want more insights like this? Subscribe to our newsletter and receive actionable marketing strategies, case studies, and expert tips directly in your inbox. Let’s scale your business together, one strategy at a time!